

Saint Patricks Day has a special place in my heart - it's the day I was SURE my daughter would be born. Like, SURE. But she had other plans, as I've found children always do - and always will. ;)
But even though Emmy was born on the 19th, I feel like she is still an Irish type soul... Like, in 20 years, she'll be a Guinness girl as opposed to a Pabst girl. I can hope at least, right?
So anyway... Here is the Lucky in Love Onesie Tute! Enjoy!

You Will Need:
- A white Onesie, or a white tee shirt
- One pack of Dylon Dye in 'Tropical Green
', or similar
- Tulip Matte Fabric Paint in 'Lime
', or similar
- Freezer paper
- Paint brush or foam brush, per your preference
- Iron, ironing board
- This image printed out: [or similar] *Click shamrock for full-size image*
 |
| Source |
- Patience to let your finished Onesie tumble dry completely before taking photos :/
Complete disclosure: After I finished this, Jonas (the Hubs) asked "why didn't you just dye the Onesie and then paint it?" To which I explained that I didn't know how the paint was going to react, if at all, to the dye bath, and I was curious. But I can tell you that the color of the paint did not change, and if you want to dye first - then paint - you will get what I think would be the same result. K? K.
Ok, let's go!
First, print out your shamrock [or draw one, or whatevs]. I printed this one just as is, no scaling, and it came out pretty big! You may need to scale it down if you're making an itty bitty Onesie. Mine here is an 18 monther.
Cut out your printed shamrock and trace it onto a piece of freezer paper. Make sure to leave yourself a wide enough border of freezer paper outside the shamrock, so as to avoid any painting overzealousness mishaps. Trust. I'll explain this further below.
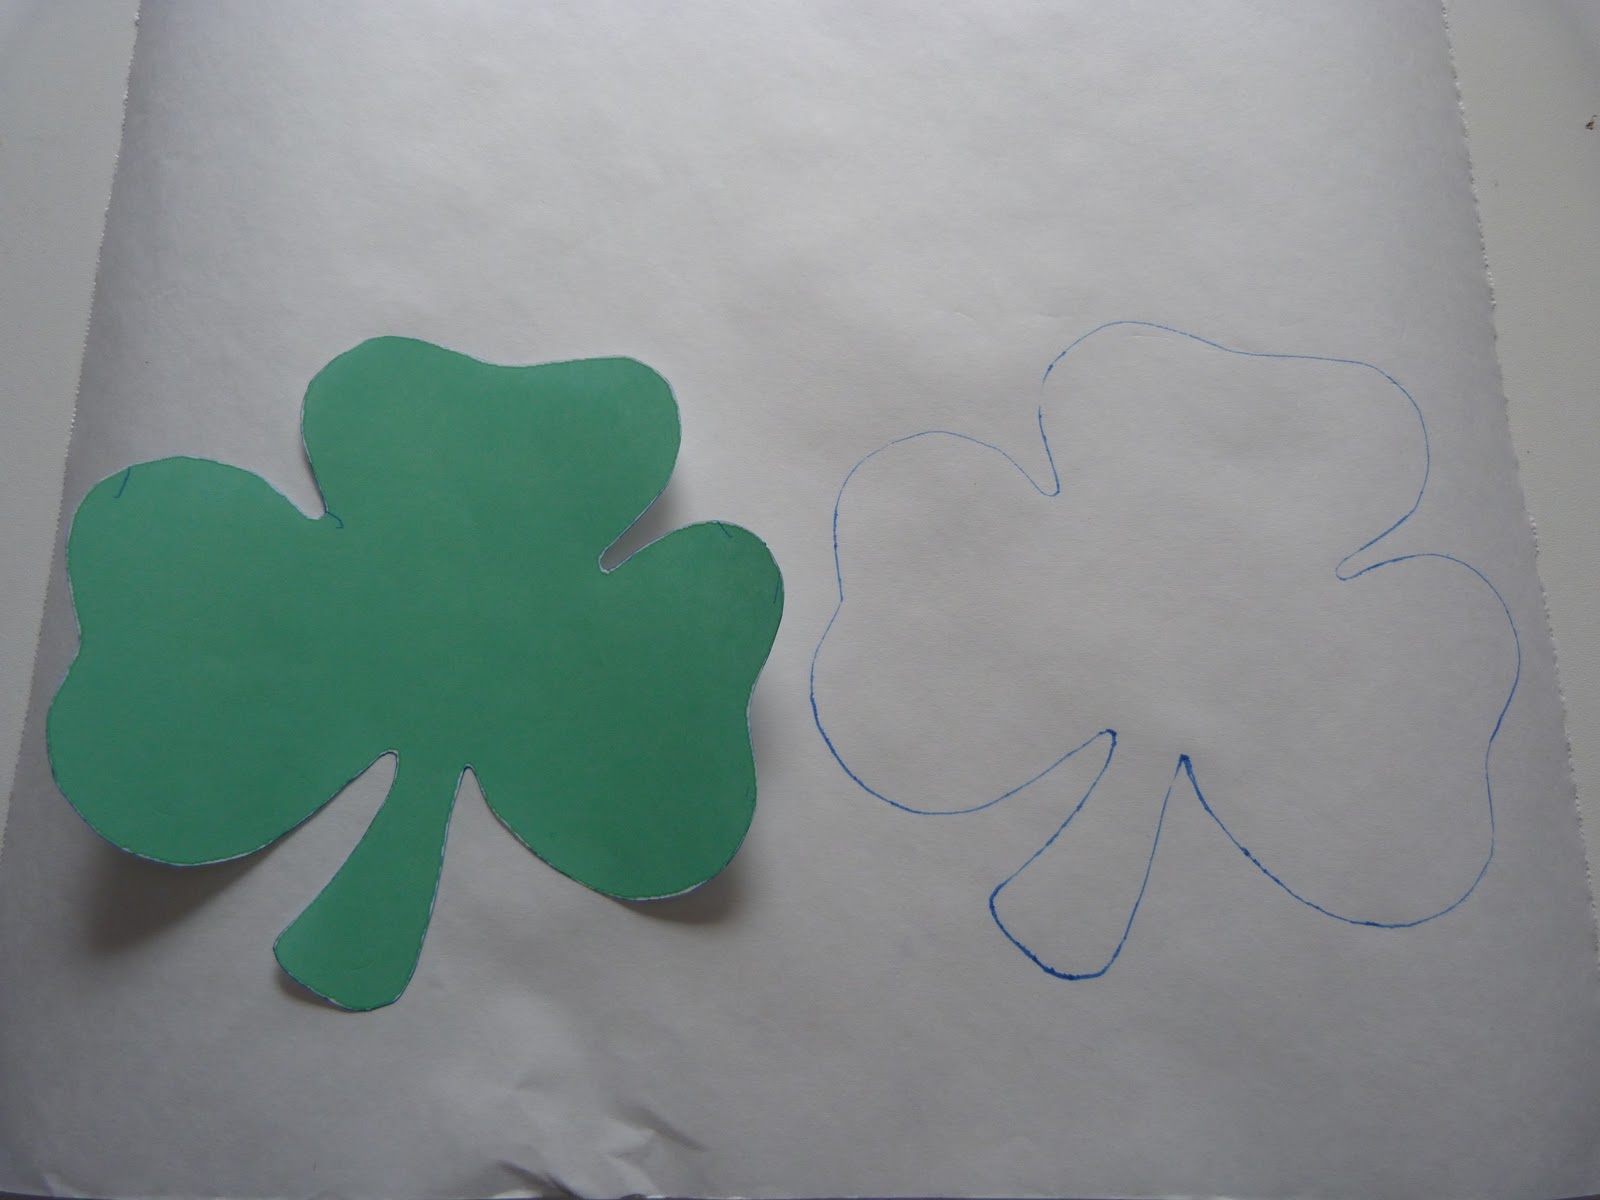 |
| Traced! |
 |
| Shiny side down. |
Now, jab a hole into the middle of your shamrock and start cutting it out! See all the room I left around the shamrock? This will be trimmed later on, but make sure you have plenty'o'extra. [Or, if you've done this before and aren't klutzy like me, just go ahead and cut it however you normally do :]
 |
| Snip snip! |
 |
| Snip snip snip! |
Save your scraps to cut out the little heart!
All cut out:
 |
| What's happening to my desk? |
Cut out a wee little heart from your scraps:

Ok, now you want to set everything up for pressing. I slid my Onesie onto the narrow end of my ironing board. If you are working with a smaller Onesie, you may not want to do this because you don't want to stretch or distort the fabric. If that is the case for you, just lay it flat and smooth on top of your ironing board. No problemo.
Now with the shiny side down, position the freezer paper stencil where you want it on your Onesie. I made mine a little off center and a little tilted.
Press the stencil onto your Onesie with high heat [cotton setting] and NO steam. [I ironed on the shamrock first, then positioned and pressed the little heart after.] Move the iron slowly, but not too slow, and apply plenty of pressure. I pressed for about 3 or 4 minutes.
 |
| Cute! |
Now we paint! You'll want to slide a piece of paper or cardboard into the Onesie so that your paint won't bleed through:

 |
| Gloop! |
When I paint with this stuff, I like to use this kind of brush (below). It seems to create a smoother finish, in my experience. Some prefer a sponge dabber thing, or a foam brush. Up to you, really!
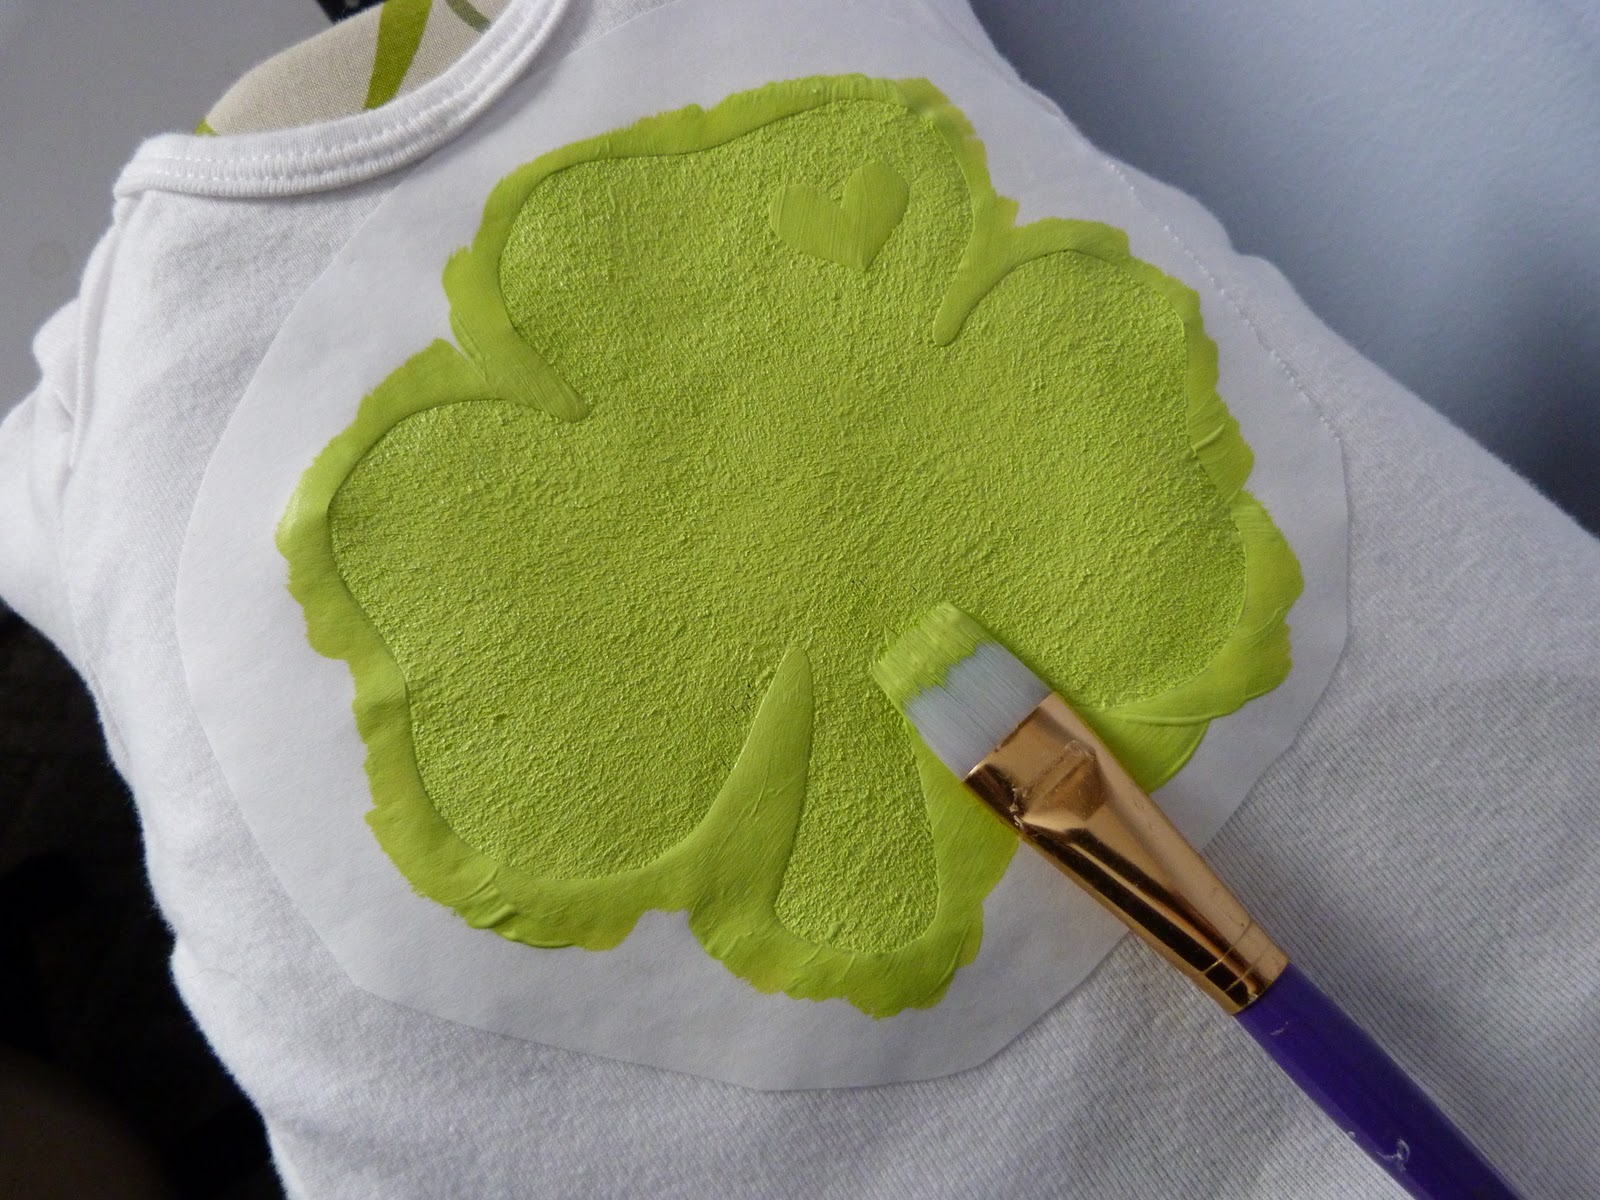 |
| Tread lightly around the edges - you don't want to inadvertantly flick any of the stencil up. And see how I've left myself plenty of extra freezer paper for wiley brushstrokes? :) |
Now, per the paints' instructions, apply 2 coats and let it dry for 4 hours. Did I let it dry for 4 hours? No. Do I ever follow instructions? No. So I just put it under a warm desk lamp for about an hour. As soon as it wasn't tacky anymore, I moved on. Do I recommend this? No. My results were perfect, but everyones' individual experience could be different. To ensure the proper outcome, follow the instructions. ;)
While you're waiting for the paint to dry, familiarize yourself with the instructions for the dye that you're using. Don't mix it yet, just ready yourself.
 |
| Mmm, tropical... :) |
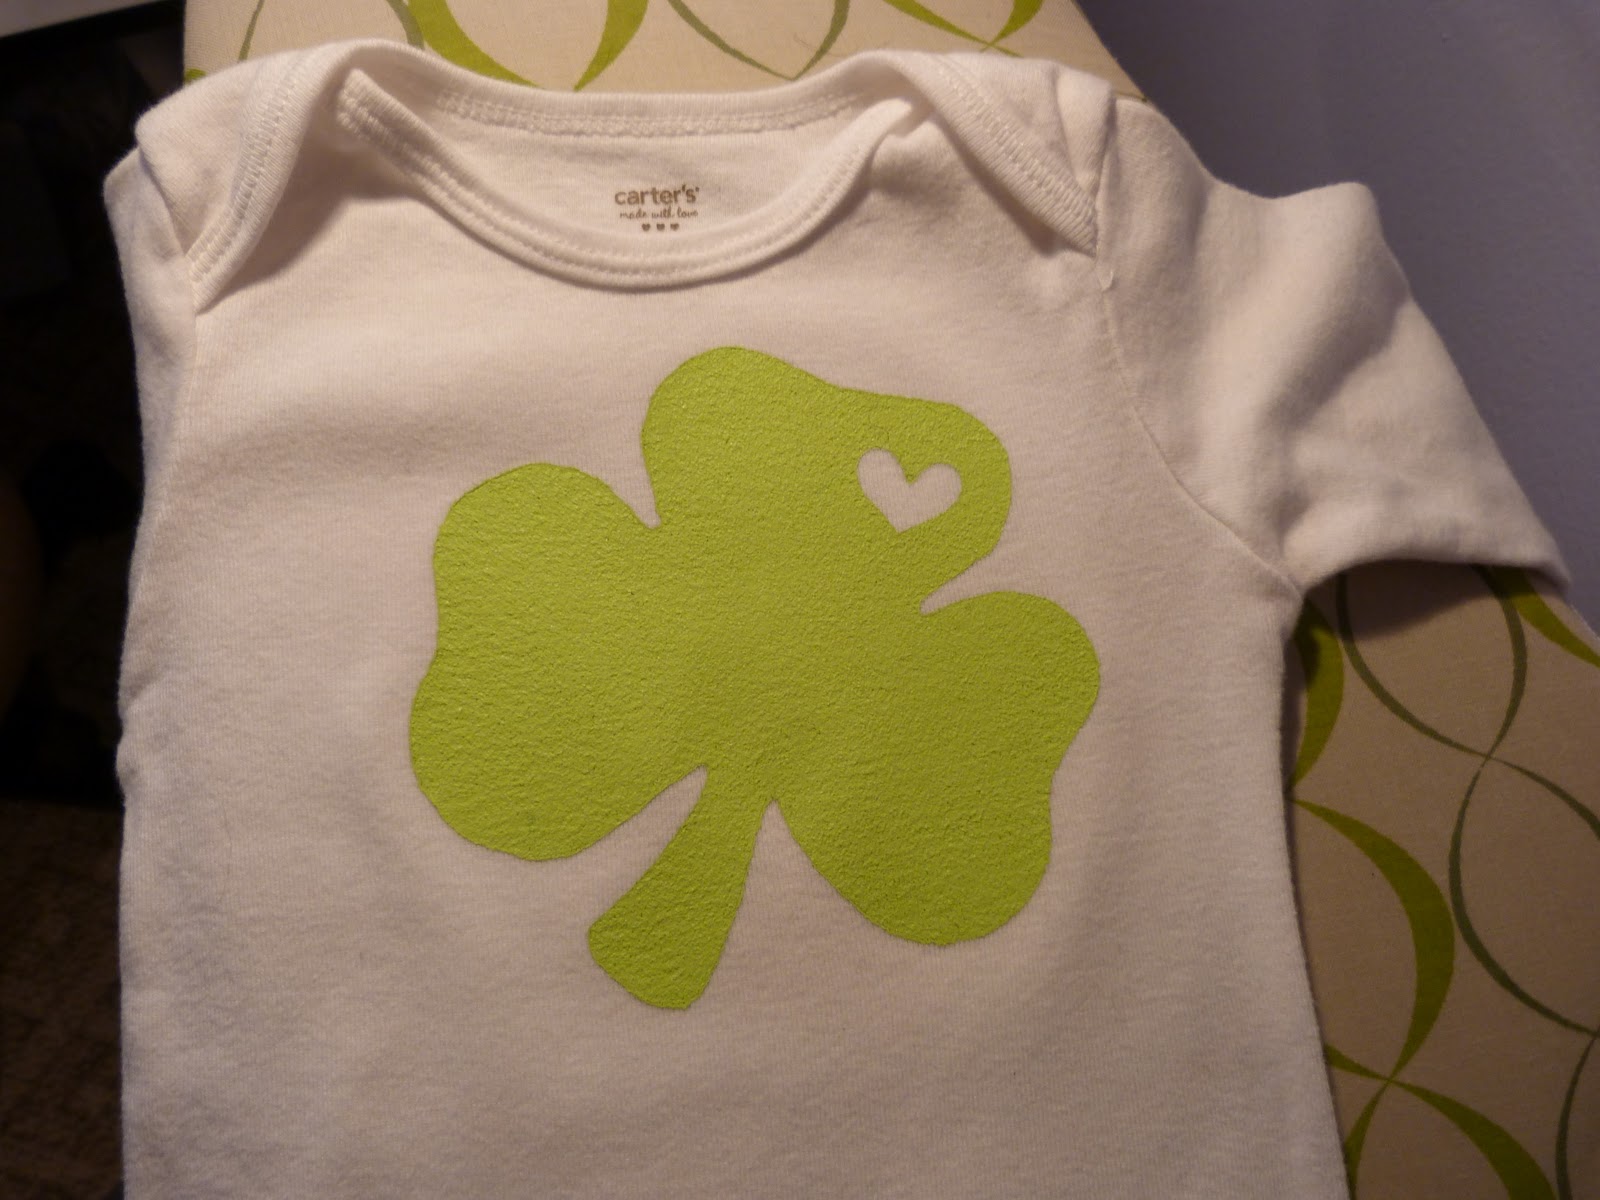
When you are satisfied with the dryness of your paint, peel off your stencil! Be very careful, work slowly. To get the little heart up, I had to use tweezers. No damage done, thank goodness :)
Tada!:
 |
| Hi! |
Now, set your paint by pressing with a press cloth, or any other type of thin fabric. Press on high, no steam, with pressure.
 |
| Pressing with press cloth. |
Press until your paint looks nice and smooth and pretty!
 |
| OOoh! |
Now get your dye ready! Definitely follow the instructions here! You don't want to mess around with this stuff. Pardon the eewie state of my sink.
 |
| Fun! |
 |
| Little shamrock friend! |
 |
| Took it out for a second to take a peek! Lookin' good! |
From my experience with these fabric dyes, the color you see your fabric taking on in the dye bath is quite a bit darker than your result will be [plus, being wet it'll def look darker]. So I generally leave the fabric in for a bit longer than it looks like it needs.
Rinse your Onesie as per the dye instructions. I then tumble dried mine with a few dark colored towels.
THAT'S IT! You're all done!
 |
| Those darker lines near the bottom there are from my dryer impatience... It was still a little damp, hence the creases & color wonkatude. |
 |
| Precious! |

I hope you enjoyed this tute! Let me know if you have any questions!
If you make one, shoot me a line! I'd love to see it!

I love the green color. We can't get Dylon here (though iDye is similar) and I'm such a sucker for green. Found you via Tip Me Tuesday! :)
ReplyDeleteThanks, Amber! Yeah, this green came out really great!
ReplyDeleteThanks for visiting! :D
Hi Sarah! I tried to e-mail you but can't find your address. I did a feature on your cute onesie on my blog Stubbornly Crafty. I of course gave you all the credit and linked to your site for them to follow to get the tutorial. Thanks so much for inspiring!
ReplyDeleteLisa
http://stubbornlycrafty.blogspot.com/
Lisa, WOW! Thank you so much!!
ReplyDeleteI'm sorry you couldn't get ahold of me easily - I'll make a 'contact me' page asap!!
Thanks again, so much! :D
This is too cute. Thanks for the tutorial.
ReplyDeleteThanks Stephanie!
ReplyDeleteNo prob! :D
i just ran into your blog and have been checking it out- i'm loving it and am cracking up/inspired :)
ReplyDeleteThis is beyond adorable! I am featuring it at somedaycrafts.blogspot.com. Grab my "featured" button.
ReplyDeleteAlyssa, thank you so much! Glad you likey! :D
ReplyDeleteMichelle - I DIE! THANK YOU! You are my first feature! GAH!
ReplyDeleteAhhhh thank you thank you thank you!
what a great idea! Thanks for sharing this tutorial. I found you on Someday Crafts. ;)
ReplyDeleteThis is so cute and the colors are beautiful!
ReplyDeleteThank you, gals!! :D
ReplyDeletehow cute is that?!
ReplyDeleteThanks Flannery! You sound Irish! :D
ReplyDeleteCheers!
We just did our shirts ( minus the dye part as the paint is still drying ... I am a direction follower LOL ) . This was fun and easy ( right up my alley ) . I did a few tweeks to ours since my boys wanted Dinos instead of shamrocks but whats a mom to do right . We also did one for my sons teacher . WOOHOO thanks for the fun idea .
ReplyDeleteOmg, YAY! I'm so glad you're making them! Are you going to dye them? That's the really fun part!
ReplyDeleteI'd love to see them when you're done!! Dinos!?! Awesome! :D
Yup we are dying them . They didn't have the dye you said so I just went with what they had and have my fingers crossed . I would love to share a photo when they are done.... if I can figure out how ?? LOL
ReplyDeleteYay!!! I'm sure they'll turn out super cute! If you can get pics, send them to my email (under 'Contact Me'... I'll share them with my 24 (awesome) followers, lol! That is, if you would want me to :)
ReplyDeleteGood luck Misti!
Okay just finished mine .. OMG SO cute !! My green is much darker then yours and the lime was a bit sparkley LOL its so cool . I'm excited to get the rest of them done . I did a purple horse with my neices name on it and I'm gonna dye it tangerine I think . I don't know how to post a pic though .
ReplyDeleteOY hahaha I just saw your comment about emailing them to you . I sure will . But I'll wait until my other ones are done first thing tomorrow .
ReplyDeleteThis onesie is just adorable. I have done a lot of freezer paper stencils but never with dye. I'll certainly give this a try!
ReplyDeleteYay Misti! I can't wait to see them!!
ReplyDeleteOur Seven Dwarfs, thank you! Yes, do try it! It's so fun! :D
Wow! How great is that? I would have never thought to die a onsie! Thanks for linking and sharing. :)
ReplyDeleteNo prob, Lindsey! Thank YOU! :D
ReplyDeleteAdorable! :) Nice work!
ReplyDeleteThank you!! :D
ReplyDeleteSarah, that is a fantastic idea!!! Absolutely too cute :)
ReplyDeletevisiting via Whipperberry!
Manni
www.ibakecakes-manni.blogspot.com
Why thank you, Manni!! :D
ReplyDeleteLOVE! I think I'll make my crew some. You and your (now no-so-secret) craftiness amaze me!
ReplyDeleteThank you Kim! TOTALLY make some! They're wicked fun, and the brood can participate! :D
ReplyDeleteAnd thanks for being amazed [blush] :)
Loos great! Stop by sometime domesticdeadline.bloodspot.com
ReplyDeletelooove this. Can't wait to make it for my nephew!! ;)
ReplyDeleteLove this! I'm a new follower! I also gave you an award over at my blog. Feel free to stop by and grab it! Dana @ D'Lea Designs
ReplyDeletewww.dlea-designs.blogspot.com
Thank you SO MUCH ladies! :D
ReplyDeleteDana - SWEET! Thank you!
Super cute!! I'm addicted to making stencils w/ freezer paper and paint, so I'm totally going to try this one too.
ReplyDeleteSteph, I agree! This is actually only the second thing I've made with the freezer paper, and I am completely addicted! Let me know if you make this one!! :D
ReplyDeleteWhat a great tutorial, thanks! I found you on "the train to crazy". I'm just wondering if I wanted to paint a word (with each letter a different colour), would it be better to paint after I dye the onesie. I'm assuming the dye would alter the colours if they're a different colour from the dye. Make sense?
ReplyDeleteThanks :)
Julie, totally makes sense. :D
ReplyDeleteI would definitely dye the Onesie first. Since I was using a green on green, I was willing to risk the paint color changing. Even though in my particular case, the paint color didn't change, I don't think I'd risk it with several different colors. Coo?
Whatcha makin?! :D
Hey Girl! Loved this so much I featured it today-- www.yesterdayontuesday.com
ReplyDeleteXO malia
YAAY! Thank you so much Malia! :D
ReplyDeleteLove it! Thank you for sharing! :)
ReplyDeleteThis is adorable... what a great idea!!! Here’s another party if you would like to link up… http://www.bubblynaturecreations.com/2011/03/project-party-weekend-5-ways-to-re.html
ReplyDeleteLove this idea!!! It turned out so super cute! Where do you buy your freezer paper? I can't find it anywhere?!?
ReplyDeleteThank you ladies! :D
ReplyDeletevanpeltium, I get mine at my local grocery store... Near the foil and Saran Wrap and whatnot. If you can bear to wait for it to ship, you can also get it here:
http://www.amazon.com/s/ref=nb_sb_noss?url=search-alias%3Daps&field-keywords=freezer+paper
Cheers!
I finished mine! Come take a look and tell me what you think :)
ReplyDeletehttp://craftingintherain.blogspot.com/2011/03/painted-shamrock-shirts.html
So flippin' cute! I love it. Thank you for sharing!
ReplyDeletewhat a great project for a very lucky baby.
ReplyDeletemegan
craftycpa.blogspot.com
YAY! How awesome!! I think I might have to make one for my nephew that is expected to arrive this week!!! <3 (And I love the way you write... reminds me of... well.. me! HA! :) Your newest follower right here. Happy Sunday!
ReplyDeleteAw, thank you gals soooo so much!!!
ReplyDelete♥ ♥ ♥
Very very cute! But just a word of caution, I used Dylon to make a bunch of dyed onesies & they all leaked ink in the washer several washes later, even with a shout dye catcher sheet! I finally had to trash them. ):
ReplyDeleteAw, what a bummer! I've washed this one twice so far with no issue. There is also a 'fixative' you can soak them in post-dye, but I've never tried that.
ReplyDeleteCheers! :D
Really want to try and make one of these... such a cute idea... I've featured this on my St.Patricks Day Activities list... Thanx for sharing x
ReplyDeleteCute cute cute!
ReplyDeleteMaking matching shirts for my whole family right now. Waiting for the paint to dry. I'm so excited! I can't wait to see how they turned out. Hope I don't screw them up. LOL
ReplyDeleteYAY, Joanna! That's awesome!!! Send me pictures! :D
DeleteMy shirts are drying now. I used gold paint for the shamrocks and they kind of look greenish-gold. I like the look though. It kind of looks like a grunge look. I think I'll paint after I dye next time. Thanks so much for sharing this. I feel so smart after making these!
ReplyDeleteSo cute!! I am making one today for Hudson! He's going to look so festive!
ReplyDeleteYAY! Send pics when you're done! :D
DeleteSo I made a shirt for my son today.......and the dye turned the clover brown! The shirt looks like it has a dead clover on it :(. I used RIT dye could that have been the problem? My husband suggested the clover might turn a litter color after it has been washed a couple of times.
ReplyDeleteOh man, that's too bad! I'm not sure what could have caused that. The one I did was a true experiment - I didn't know how it would turn out! What kind of paint did you use? If it was a fabric paint, I wouldn't think that the dye would've affected the color like that! Very curious indeed!
DeleteReally cute! Great job!
ReplyDeleteI also used RIT dye, but as of now, my paint has not reacted with the dye. I used tulip dye in "Lime" and RIT dye in "Kelly Green." Currently waiting for my shirt to finish going through a wash and a dry and then it'll be done.
ReplyDeleteI a sooo excited to find this tutorial! I have been looking for an easy screen print type of idea and this is wonderful. I was so out of sorts about the whole fabric and modge podge idea, wayyyy tooo much work. I am a instant gratification kinda girl! Your onsie was just too great and I wish I had seen this when mine were that young, but alas I will have to be satisfied with presh t-shirts!! Thanks girl!
ReplyDeleteHow did you keep the dye from getting on the shamrock? When you dip it into the bucket?
ReplyDeleteI didn't Jennifer! I just submerged the whole thing after the paint dried. :)
DeleteI saw this on Pinterest and thought that it was the cutest thing ever. I have never painted fabric before so I was just wondering what kind of texture does the clothing have after it has been painted? Does it have that plastic/rubbery like feeling like screen printing does? I'm asking because I was thinking of doing this to a kitchen towel, but if it leaves the material with that screen printing feeling then the towel won't be very absorbant.
ReplyDeleteI saw this on Pinterest and fell in love with the project right away! I ended up making 6 different onesies for a baby shower!
ReplyDelete