G'day!
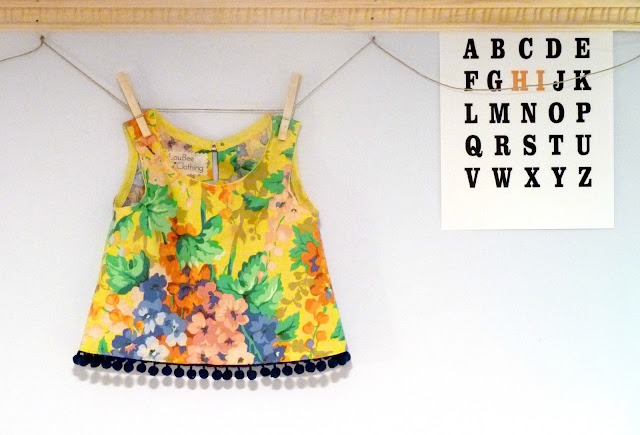
So here is my most recent sewing success...
I knew then that I would need to make jabillions more of them. Pompoms are just so underutilized, right?!
This ridiculous (in a good way) fabric is
Delphinium by Phillip Jacobs. I've had it forever - I've been on this kick lately to start using these fabrics that I just want to save and stare at forever and ever. It's hard! But when the result is a cute little tank like this, it stings a little less. ;)
I did make and use my own pattern for this tank. I am/was willing to make it presentable and upload it, however, just a short while ago the super talented
Kelli from True Bias introduced for download her
Toddler Swing Tank pattern - which also happens to be in a size 2T - and is similar in style to my tank. Her pattern is heaps more professional than I could hope for mine to be, so I'd recommend heading over there if you'd like to make a tank like this one! Tell her Sarah sent'ya. :)
 |
| Not so invisible stitching :P |
Check out my label! More on that later.
Emmy has a huge head. Let's just get that right out into the open. When I draft patterns for her, I am never 100% sure that the thing will fit over her head. So I almost always make a back neck opening with a button and loop, to make SURE her big'ol noggin' will fit into these garments. I made this tank the other night, so the lighting wasn't optimal for detail shots of how to do this. So alternatively, you get this fantastically professional and eloquent sketchy tutorial on how to make a back neck slit/opening on a top that doesn't have a back center seam.
Enjoy!
Forgot to mention in Step 4. - Stitch down about 2½ inches.
On my tank I pinked the edges (Step 10), and I think it looks great!
You could also use this technique on existing tops with too-tight head holes (lolwut), and on bigger kids or grown up tops! Just adjust the scrap piece, and how long the opening is, accordingly.
When you've finished these steps, just proceed as you would normally when finishing a neckline - with bias tape, or turning and stitching, etc. Don't forget to insert a button loop in there, too. Or you could sew on a hook and eye when all is said and done. Up to you!
So there you have it! If you have any questions, or just want to make fun of me, leave a comment below!
The weather has been cold and rainy up here in the Northeast, so when it gets nicer out I'll post some pics of Emmy in this tank on my Facebook page!
Happiest of Fridays to you, my friends!

Please Pin responsibly. If you like something you see here that isn't original to
EmmylouBeeDoo.blogspot.com, please click through to the original Author's post.
Thank you!


Super cute--I love the pom pom trim!
ReplyDeleteThank you, Steph! :D Those poms are a pretty blue... They're coming across so very dark in these pics. Hopefully some daylight shots will come out better. :)
Deletelove this! that fabric is also fantastic..lovely and bright! :-)
ReplyDeleteCuteness! Thank you for sharing this.
ReplyDeleteadorable! and yes, pompoms are most definitively underutilized. :-) great tutorial!
ReplyDeleteVery cute shirt! I love sewing for my little one and making up my own paterns too!
ReplyDeleteHere is my Sundae Scoop link: http://likemamalikedaughter.blogspot.com/2012/05/how-to-tuesday-cottontail-cape.html
Thank you Hannah! Cute cape! :D
DeleteHow cute! The pompoms are great!
ReplyDeletecute cute! thanks for linking up to Make it Monday!
ReplyDeleteVery cute and I love your sketches, too! Great idea! I'd love for you to add it on my link party at: http://printabelle.com/?p=3188 Thanks!
ReplyDeleteThat fabric is so pretty. Lucky you to have a little girl to sew for. The pom poms add just the right touch to the top.
ReplyDeleteThat is a really cute top!
ReplyDeleteI have been wanting to know how to make back opening like this (my little one has a big head too!), so THANK YOU!!!
Great tutorial!!! Love the button and the pompoms!! Can't wait to get more info on your label!! LOVE IT!
ReplyDeleteThanks so much for sharing at The DIY Dreamer.. From Dream To Reality!
these are great. I hope you'll stop by and add this and any other posts you're proud of to my Wednesday What We Wore and Made Link party
ReplyDeletemarissa
http://raegunwear.blogspot.com
Such a cute shirt!! :) xo Holly
ReplyDeletethese are so cute! love the added pom pom fringe! thank you for sharing at Uncommon ! featuring this on our facebook page tonight! :)
ReplyDeleteThis is precious! Thanks for sharing.. I'm featuring you today! : )
ReplyDelete